Last verified: August 3, 2026
TradingView alerts monitor a condition and notify you when it is triggered, so you do not need to keep watching a chart. An alert can be based on price, an indicator, a strategy, or a supported drawing. The most important part is not clicking the Alert button; it is confirming the symbol, timeframe, condition, trigger frequency, expiration, and notification method before saving.
Important: An alert is a monitoring tool, not a prediction or trade recommendation. Alerts can be delayed by data, connection, device, and notification settings, and they should not be your only risk control.
Five Ways to Create a TradingView Alert
Open TradingView and use whichever alert method best matches what you are monitoring:
- Select Alert in the top chart toolbar.
- Select the create-alert control in the Alert Manager.
- Right-click the chart and choose Add alert.
- Use the plus control on the price scale to create an alert at a selected price.
- Use
Alt + Aon Windows orOption + Aon macOS.
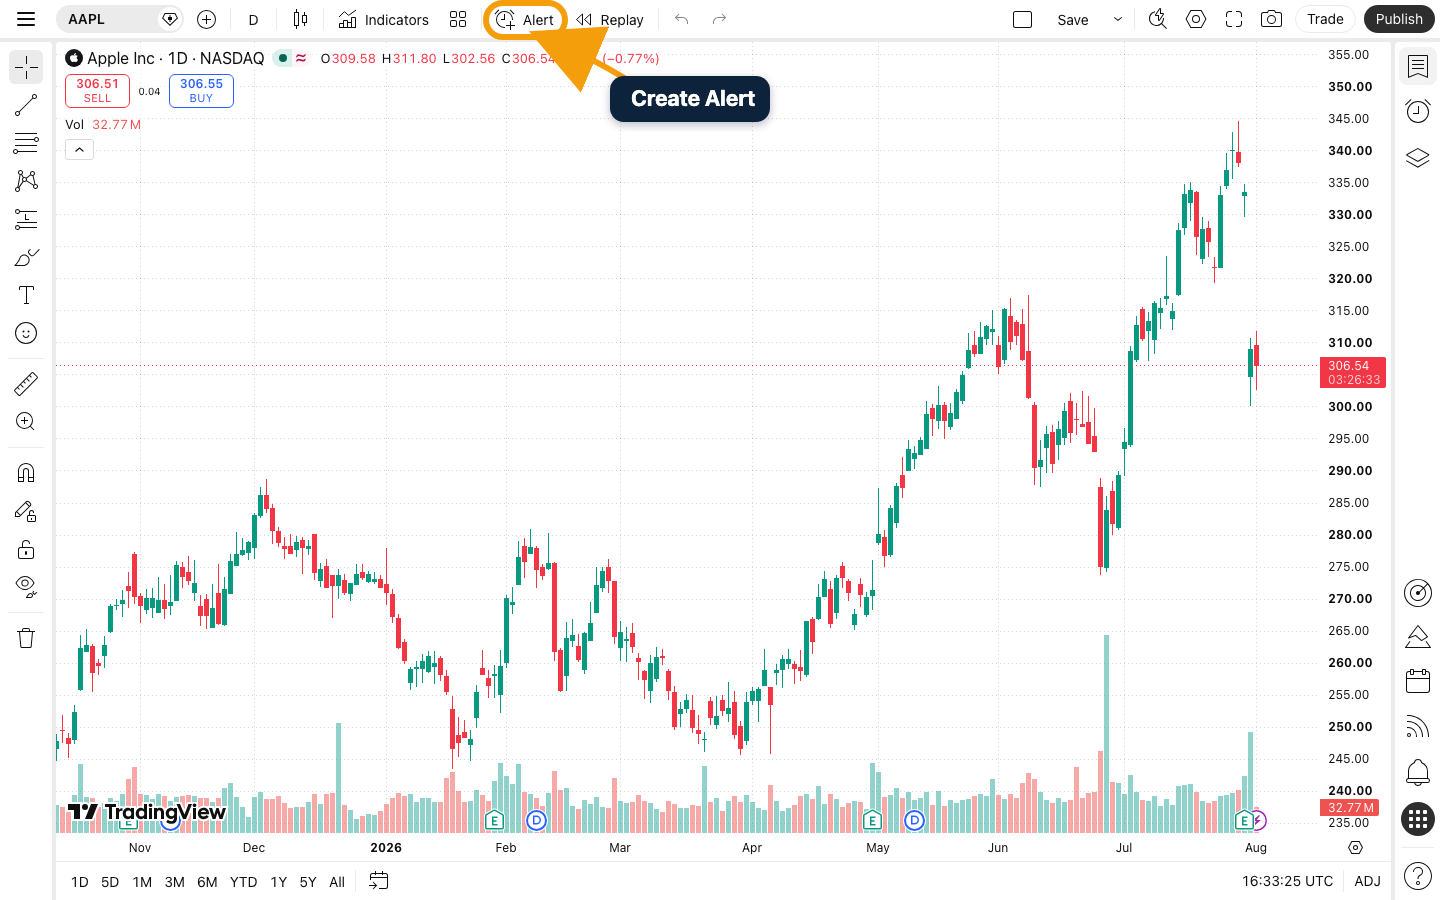
Right-clicking a chart can open a context menu with an alert option for the selected symbol and price.
Creating the alert from the relevant price, indicator, or drawing can prefill part of the condition, but always review every field rather than assuming the prefilled values are correct.
Configure the Alert Condition
The Condition section defines what TradingView should monitor. A simple price alert can trigger when a symbol crosses, moves above, moves below, enters, or exits a selected value or range. Technical alerts can depend on an indicator, strategy, or drawing.
Check these fields before saving:
- Symbol: confirm the correct exchange, market, and data source.
- Condition: choose the exact crossing or comparison rule you intend.
- Value: check decimals and units carefully.
- Timeframe: indicator and drawing conditions can depend on the selected interval.
- Expiration: set an end date, or an open-ended alert where your plan supports it.
- Name and message: describe what happened and what you planned to review next.
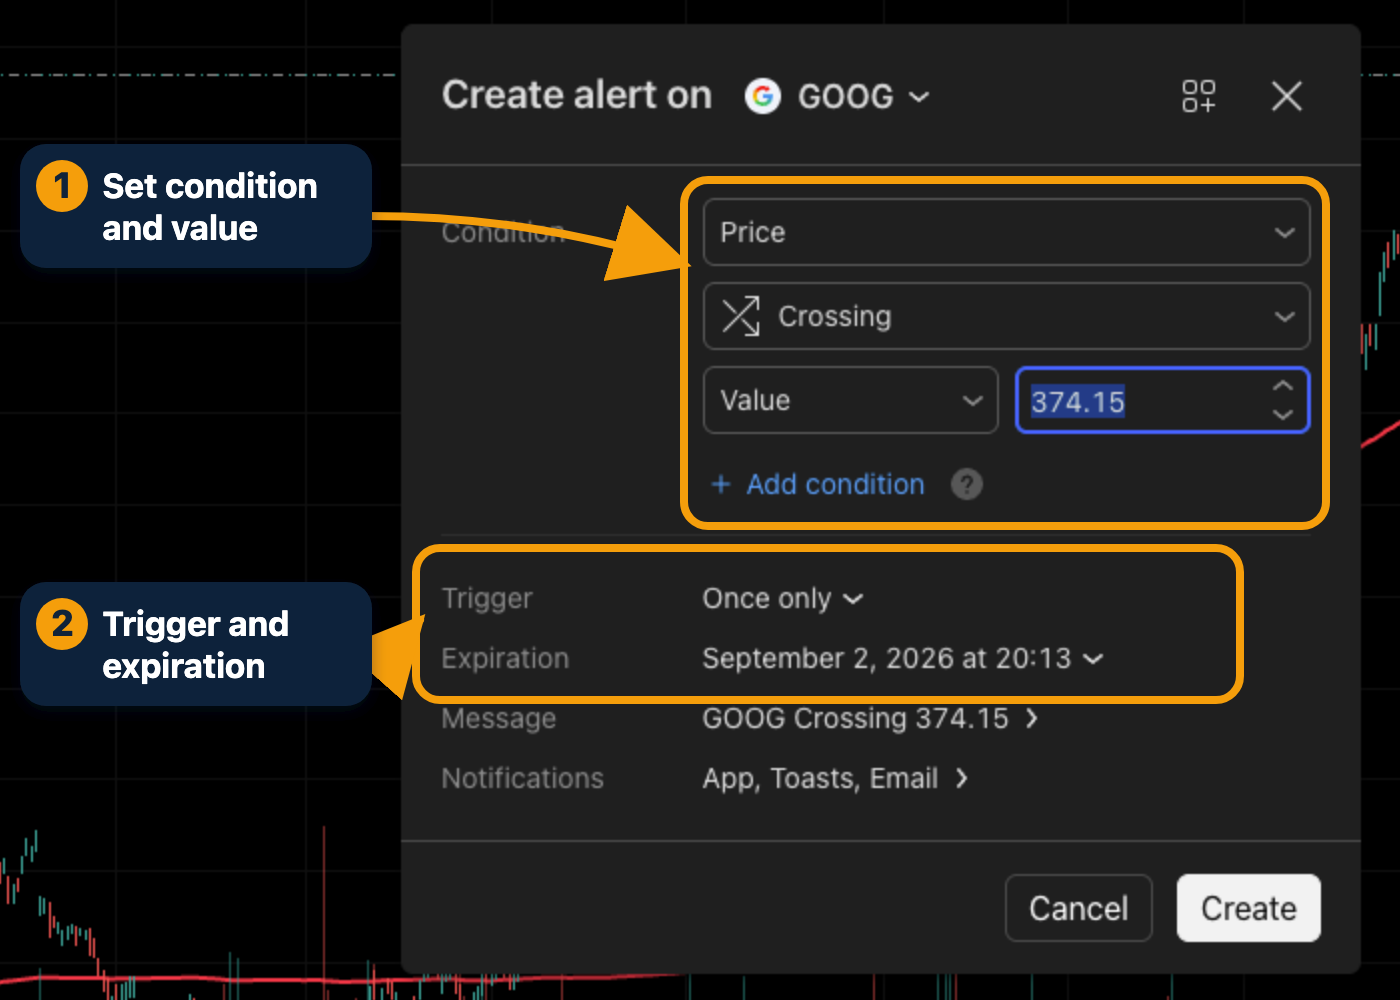
A useful alert name is specific enough to understand without reopening the chart. For example, AAPL daily close above review level is more useful than Apple alert. This is an interface example, not a recommendation involving that security.
Choose the Correct Trigger Frequency
The trigger setting determines how often the alert can fire. Available choices vary by condition and plan, but common behavior includes firing once, once per bar, once per bar close, or every time the condition is met.
| Frequency | When it can help | Main risk |
|---|---|---|
| Only once | A one-time level or event that does not need continued monitoring. | The alert stops after the first trigger. |
| Once per bar | A condition that should not repeat several times inside the same chart bar. | The bar can still change before it closes. |
| Once per bar close | A rule that requires the condition to remain true when the bar is complete. | The notification arrives later than an intrabar trigger. |
| Every time | Specialized monitoring where repeated events are intentional. | It can produce too many notifications. |
Bar-close confirmation does not make a signal correct; it only defines when the condition is evaluated. Match the frequency to the written rule rather than selecting whichever setting triggers earliest.
Choose Notifications You Will Actually See
TradingView’s current alert dialog can offer app notifications, pop-ups, email, sound, plain-text email delivery, and webhooks where supported. Availability can depend on the platform and plan.
- App notification: useful away from the desktop after enabling mobile permissions.
- Desktop pop-up: useful while TradingView is open, but easy to miss when the browser is closed.
- Email: creates a searchable record but may not arrive instantly.
- Sound: useful only if the device is active and audible.
- Webhook: intended for external systems and should be protected carefully.
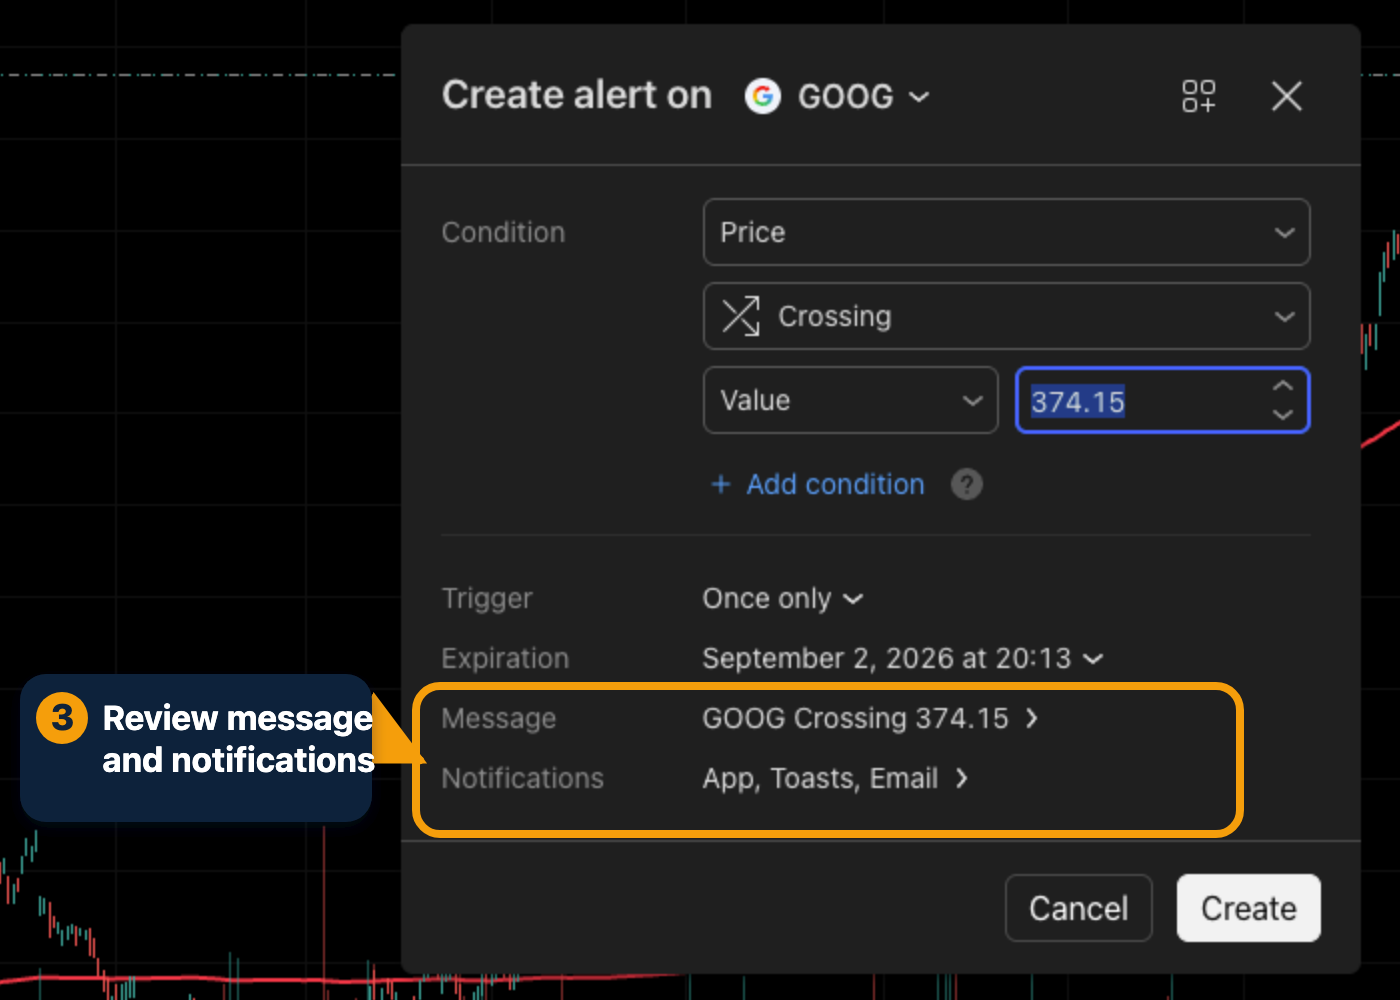
Test a non-critical alert before relying on a notification channel. Confirm that browser permissions, email filtering, mobile permissions, and device focus settings allow the message to appear.
How to Create an Indicator Alert
- Add the indicator to the correct chart.
- Set the indicator inputs and chart timeframe.
- Open the alert dialog.
- Select the indicator and the supported condition.
- Choose the trigger frequency and notification method.
- Name the alert with the symbol, timeframe, and condition.
- Save it and confirm that it appears in the Alert Manager.
TradingView warns that an alert generally stores a snapshot of the chart, indicator, and input settings at the time it is created. If you later change the indicator parameters, the existing alert may continue using its old configuration. Edit or recreate the alert after changing the setup.
Start with built-in tools you understand. Our TradingView indicators for beginners guide explains a simple chart setup without presenting indicator readings as automatic buy or sell signals.
How to Create an Alert From a Drawing
Supported drawing objects can be used as alert conditions. A common example is a price crossing a trend line. Create and position the drawing first, then open its context menu or settings and select the alert option where available.
Drawing alerts are sensitive to the selected interval. TradingView notes that an alert created from a drawing on one timeframe does not automatically become the same geometric condition on every other timeframe. Confirm the interval before creating it.
If the line is moved after the alert is created, verify whether the active alert still represents the intended condition. Do not assume that every visual edit automatically updates the alert.
How to Create a Price-Scale Alert
Move the pointer over the chart’s price scale and use the plus control at the required level. Select the alert option, then confirm the exact price and condition in the dialog.
This is a fast method for a simple level alert. It is still necessary to check the symbol, expiration, frequency, and notification settings.
Manage Alerts in the Alert Manager
The Alert Manager provides a central place to review active, stopped, and triggered alerts. Use clear names and remove alerts that no longer belong to the current analysis.
A weekly maintenance routine can prevent alert clutter:
- Delete or stop alerts linked to an invalidated setup.
- Check alerts nearing expiration.
- Confirm that technical alerts use the intended timeframe and indicator settings.
- Remove duplicate alerts and rename vague ones.
- Test notification delivery after changing a browser, phone, or email setting.
Why Did My TradingView Alert Not Trigger?
- The wrong symbol was selected: similar tickers can come from different exchanges or providers.
- The condition did not occur: touching a value is not always the same as crossing or closing beyond it.
- The timeframe was different: technical and drawing conditions may depend on the interval used at creation.
- The alert expired or stopped: check its status in the Alert Manager.
- The underlying settings changed: the alert may still use the earlier indicator snapshot.
- The notification was blocked: browser, app, email, or operating-system permissions can suppress delivery.
- The plan limit was reached: current active-alert limits vary between Basic and paid plans.
- Data was delayed or unavailable: alert timing depends on the symbol’s data feed.
TradingView Alert Limits
TradingView separates price alerts, technical alerts, and watchlist alerts in its current plan comparison. Limits vary significantly by plan and can change. On the August 3, 2026 verification date, Basic listed three price alerts and no technical alerts, while paid plans increased both categories.
Compare the current limits in our TradingView pricing guide. Do not upgrade only because a higher number looks useful; first confirm which alert category your actual workflow requires.
Create a TradingView Alert Read the Beginner’s Guide
Affiliate note: We may earn a commission from qualifying TradingView purchases made through our links, at no extra cost to you.
